Minecraft is more than just a game; it is a global phenomenon that has captivated millions of players with its boundless creativity and open-ended gameplay. However, before you can build massive castles or automate complex farms, you must master the art of survival. The world of Minecraft is beautiful, but it is also harsh. Monsters lurk in the dark, hunger is a constant threat, and the terrain itself can be treacherous.
If you are stepping into this blocky world for the first time, the experience can be overwhelming. There is no tutorial, no minimap, and no clear objective other than to survive. This comprehensive guide is designed to walk you through your first few days and set you up for long-term success. We will cover everything from your first day’s priorities to advanced exploration strategies. Here are the essential Minecraft survival tips for beginners to help you thrive in your new world.
Day One: Surviving the First Night
The first day in Minecraft is the most critical. You spawn into the world with nothing but your bare hands, and you have exactly 10 minutes of daylight before monsters (mobs) begin to spawn. Efficiency is key.
1. Punch Trees Immediately
Your very first action should be to find the nearest tree and punch it. Hold down the left mouse button (or the attack button on your controller) until the wood block breaks. Collect at least 5-6 logs.
- Craft Planks: Open your inventory and place the logs in your 2×2 crafting grid to create Wood Planks.
- Crafting Table: Use 4 planks to make a Crafting Table. This is your most important tool, unlocking the 3×3 crafting grid.
2. Make Basic Tools
With your Crafting Table placed down, craft Sticks (2 planks vertically). Then, combine sticks and planks to make your first Wooden Pickaxe.
- Tip: Do not craft a full set of wooden tools. They have very low durability. You only need the pickaxe to upgrade immediately.
3. Upgrade to Stone
Dig down or find an exposed cliffside to mine Stone. You need about 20 blocks of Cobblestone. Use the crafting table to create a complete set of Stone Tools (Sword, Pickaxe, Axe, and Shovel). Stone tools are significantly faster and last longer than wood. You should also craft a Furnace using 8 Cobblestone.+1
4. Secure Food and Wool
As you explore, look for animals.
- Sheep: Kill 3 sheep of the same color if possible to get Wool. This allows you to craft a Bed (3 Wool + 3 Planks). A bed lets you sleep through the night, skipping the danger of monsters entirely.+1
- Cows/Pigs/Chickens: These provide food. Raw food restores very little hunger; you will need to cook it in your furnace.+1
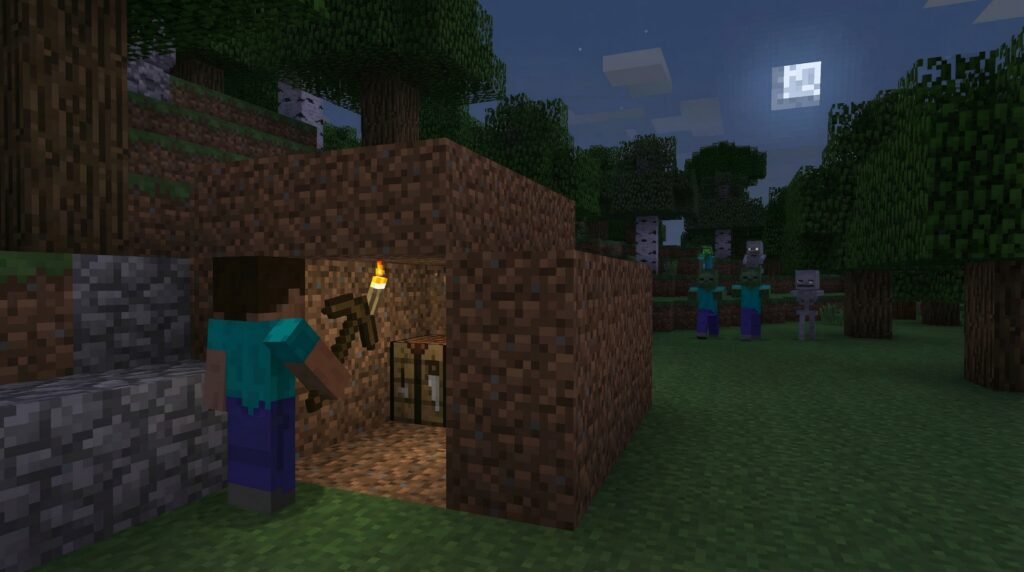
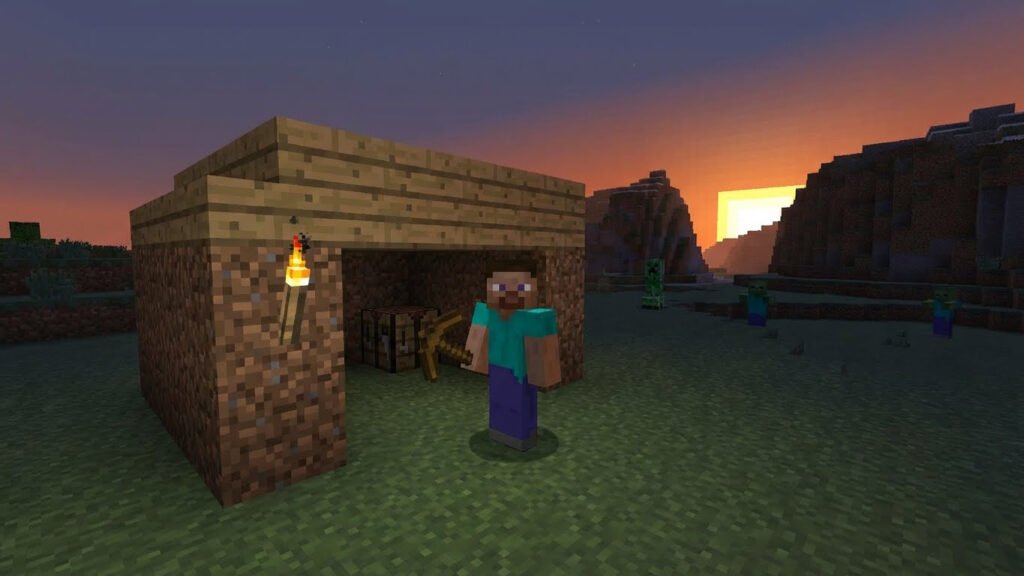
5. Build a Shelter
Before the sun sets, you need a safe place. It doesn’t have to be a mansion. A simple “dirt hut” or a hole dug into the side of a hill works perfectly.
- The Coffin Technique: If you are caught outside with no shelter, dig a hole 3 blocks deep, jump in, and place a block over your head. Wait until you hear the burning of zombies (sunrise) before coming out.
- Light it Up: If you found Coal while mining stone, craft Torches. If not, smelt logs in your furnace using other wood as fuel to make Charcoal, which works exactly like Coal. Place torches inside your shelter to prevent mobs from spawning inside with you.+1
The First Week: establishing a Base
Once you have survived the first night, it is time to stabilize your situation. You need a reliable source of food and resources. One of the best Minecraft survival tips for beginners is to establish a permanent base of operations near essential resources like water and trees.
1. Sustainable Food Source
Hunting animals is not sustainable long-term. You need a farm.
- Wheat Farming: Break the tall grass growing on dirt blocks. It has a chance to drop Seeds. Craft a Stone Hoe and use it on grass or dirt blocks near water to create Farmland. Plant the seeds. When the wheat turns fully yellow/brown, harvest it to get Wheat (for bread) and more seeds.
- Animal Pen: Use the Wheat you grew to lure cows and sheep into a fenced area. Feeding two animals of the same species wheat will make them breed, creating a baby animal. This creates an infinite food supply.
2. Strip Mining for Iron
Iron is the next tier of progression. You need Iron for strong armor, buckets, and shears.
- The Strategy: Dig a staircase down to coordinate Y=15 (you can see coordinates by pressing F3 on Java Edition or enabling “Show Coordinates” in Bedrock Edition settings).
- Branch Mining: Dig a long main tunnel, and then dig smaller tunnels branching off the sides every two blocks. This maximizes your chances of exposing Iron Ore and Coal.
- Iron Smelting: Smelt the Raw Iron in your furnace to get Iron Ingots. Prioritize crafting a Shield first (1 Iron Ingot + 6 Planks), then an Iron Pickaxe, then a full set of Iron Armor.
3. Storage Organization
You will quickly run out of inventory space. Craft Chests (8 Planks in a ring).
- Organization Tip: Don’t just dump everything into one chest. Make separate chests for “Blocks” (Dirt, Cobblestone), “Valuables” (Iron, Gold, Diamonds), “Food”, and “Mob Drops”. Staying organized early on saves you hours of headache later.
Combat and Defense: Handling Mobs
The world is dangerous. Knowing how to fight—and when to run—is crucial.
1. The Importance of the Shield
The Shield is arguably the most overpowered item for early game survival. Holding a shield (Right-click/Crouch) blocks 100% of damage from arrows and explosions.
- Creepers: When a Creeper hisses, raise your shield. It will absorb the entire explosion, leaving you unharmed (though the terrain will still break).
- Skeletons: Wait for the Skeleton to shoot your shield, then rush in and hit them while they reload.
2. Mob-Specific Tactics
- Zombies: They are slow. Hit them, back up, hit them again.
- Spiders: They jump at you. Try to hit them while they are in mid-air to knock them back.
- Endermen: Do not look them in the eyes (crosshair). If you aggro one, stand under a 2-block high ceiling. Endermen are 3 blocks tall and cannot fit, so you can attack their legs safely.
3. Light Levels
Mobs spawn in darkness. To keep your base and surrounding area safe, place torches everywhere.
- Mechanic Change: As of recent updates, hostile mobs only spawn in complete darkness (Light Level 0). However, it is still best practice to light up caves and your base brightly.
Exploration and Navigation
Getting lost is the most common way beginners lose their progress. These Minecraft survival tips for beginners focus on navigation to ensure you always find your way home.
1. Use Coordinates
Coordinates are your GPS.
- X and Z: represent your horizontal position on the map.
- Y: represents your height/elevation.
- Action: Write down the X, Y, Z coordinates of your house on a real piece of paper or in your phone’s notes app. If you die or get lost, you can simply navigate back to those numbers.
2. Landmarks and Beacons
- Torches on the Right: When exploring caves, always place torches on the right-hand wall. When you want to leave, turn around and follow the torches on your left. This simple rule prevents you from running in circles in complex cave systems.
- Pillaring Up: If you are lost on the surface, gather dirt or sand and “pillar up” (jump and place a block under you repeatedly) 20-30 blocks high to get a better view of the surroundings.
3. Bed Management
Always carry a bed when exploring far from home. If night falls, place it down and sleep to reset your spawn point and skip the night.
- Warning: Remember to pick the bed back up if you don’t want your spawn point to be stuck in the middle of nowhere. If you die after your bed is broken, you will respawn at the original world spawn point (which might be thousands of blocks away from your base).
The Nether: Entering the Danger Zone
Once you have Diamond tools and full Iron armor, you might be ready to visit the Nether. This hell-like dimension is required to beat the game.
1. Building the Portal
You need Obsidian to build a Nether Portal. Obsidian is created when water hits a lava source block. You need a Diamond Pickaxe to mine it. You need at least 10 blocks to make a portal frame (2 top, 2 bottom, 3 left, 3 right—corners are optional). Light the inside with Flint and Steel.
2. Nether Survival Rules
- Wear Gold: Piglins are neutral mobs in the Nether, but they will attack you if you aren’t wearing at least one piece of Gold Armor. Gold Boots are the best choice as they sacrifice the least amount of protection.
- Don’t Sleep: Never try to sleep in a bed in the Nether. It will explode with massive force, likely killing you instantly.
- Bring Cobblestone: Ghasts (floating white ghosts) shoot fireballs that explode. Cobblestone is blast-resistant and cannot be destroyed by Ghast fireballs. Use it to build bridges or shelters.+1
Advanced Progression: Enchanting and Potions
To truly become powerful, you need magic.
1. Enchanting
Enchanting infuses your gear with special abilities.
- Requirements: You need an Enchanting Table (Obsidian, Diamonds, Book) and Lapis Lazuli.
- Bookshelves: To get the best enchantments (Level 30), you must surround your Enchanting Table with 15 Bookshelves.
- Best Enchants: Look for “Fortune” on pickaxes (multiplies ore drops), “Looting” on swords (multiplies mob drops), and “Protection IV” on armor. “Mending” is the holy grail, allowing tools to repair themselves using XP, but it cannot be found in an enchanting table (you must trade with Villagers or find it in chests).
2. Potion Brewing
Potions provide temporary buffs. You need a Brewing Stand (Blaze Rod + Cobblestone).+1
- Fire Resistance: Essential for the Nether. Made using Magma Cream. It makes you immune to lava and fire.
- Healing/Regeneration: Useful for boss fights.
Don’t Give Up: The Mental Game
Minecraft is a sandbox, which means you set your own goals. Sometimes, disaster strikes. You might fall into lava and lose all your diamond gear. You might get blown up by a Creeper and lose your house.
One of the most vital Minecraft survival tips for beginners is simply resilience. Losing gear is part of the game loop. It gives you a reason to go mining again. If you feel burnt out or frustrated, take a break or switch to a “Creative Mode” world to just build for fun without the stress of survival.
Conclusion
Survival in Minecraft is a learning curve. You will die, you will get lost, and you will make mistakes. But each mistake teaches you something new about the world mechanics. By following these steps—securing your first night, establishing a sustainable food source, mastering the combat with a shield, and navigating via coordinates—you are already ahead of 90% of new players.
Remember, there is no “wrong” way to play. Whether you want to be a nomadic explorer, a redstone engineer, or a master builder, these foundations will support any playstyle. So, grab your pickaxe, double-check your torch supply, and step out into the world. Your adventure is just beginning. Hopefully, these Minecraft survival tips for beginners will serve as your trusty guide through the blocky wilderness. Happy mining!